Building The Mainline Linux Kernel
Hello Hoomans :3
Today I'll document how I went about building the latest Linus's tree. The
Linus's tree is also called as The Mainline Kernel.
As usual, I did face some hiccups (when don't I :P) while buildling it, I'll write them down after I write down the gist of it below. No one's interested in debugging anyway - Everybody wants things working fast :P
Building the Linux Mainline Kernel
Here we gooooo 🧑🚀
1. Install necessary tools
1sudo apt install build-essentials vim git cscope libncurses-dev libssl-dev bison flex2. Clone the Mainline Kernel/Linus’s Tree
1git clone git://git.kernel.org/pub/scm/linux/kernel/git/torvalds/linux.git linux_mainline3. Copy the Old Config:
1cd linux_mainline2make oldconfigThe above command reads the existing .config file that was used for an old
kernel and prompts the user for options in the current kernel source that are
not found in the file.
If you do not know what the answer to the options should be, just go with the default :)
4. Compile the Kernel
1make -j3 allNow go grab, some pizza to eat - It's going to take atleast half an hour to build. 🍕🍕🍕
5. Install the Kernel
Note that the following steps, would install the kernel and it would be available in your GRUB menu and you could boot into it and play with it :)
1su -c "make modules_install INSTALL_MOD_STRIP=1 install"To understand why I used INSTALL_MOD_STRIP=1 please read below the problem I
faced and why I ended up using it.
Problems 🐞 and Debugging 🕵️♀️
Note: By the time you read this post, there are high chances that the following might have been already fixed and addressed.
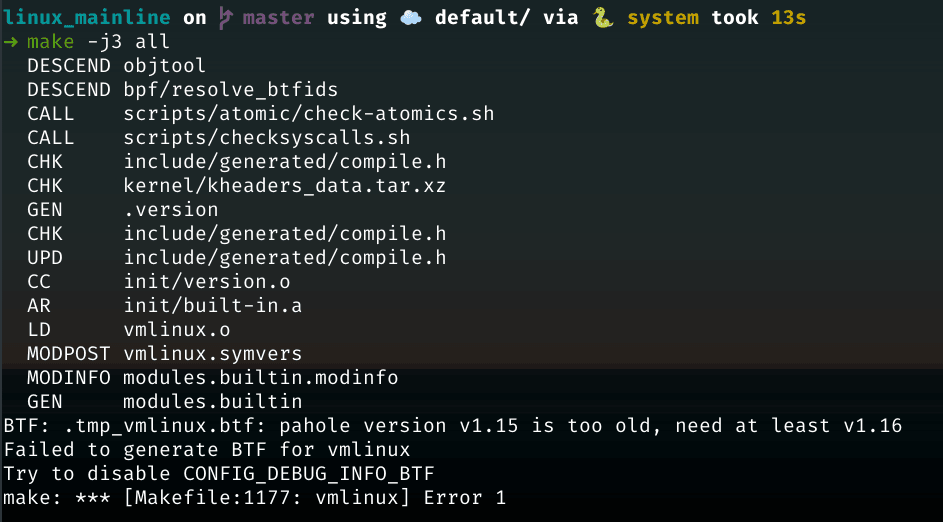
pahole not found/ Outdated pahole in Ubuntu Repository
It turned out that pahole and the dwarves libraries were not installed in my system. Installing them from the Ubuntu repo did not work out, because the mainline-kernel needed a pahole which was greater than the current available version.

Upon searching I found that the latest dwarves library supported for (20.04 Ubuntu) was 1.17.1 was upon downloading the deb and installing it I ran into another problem.

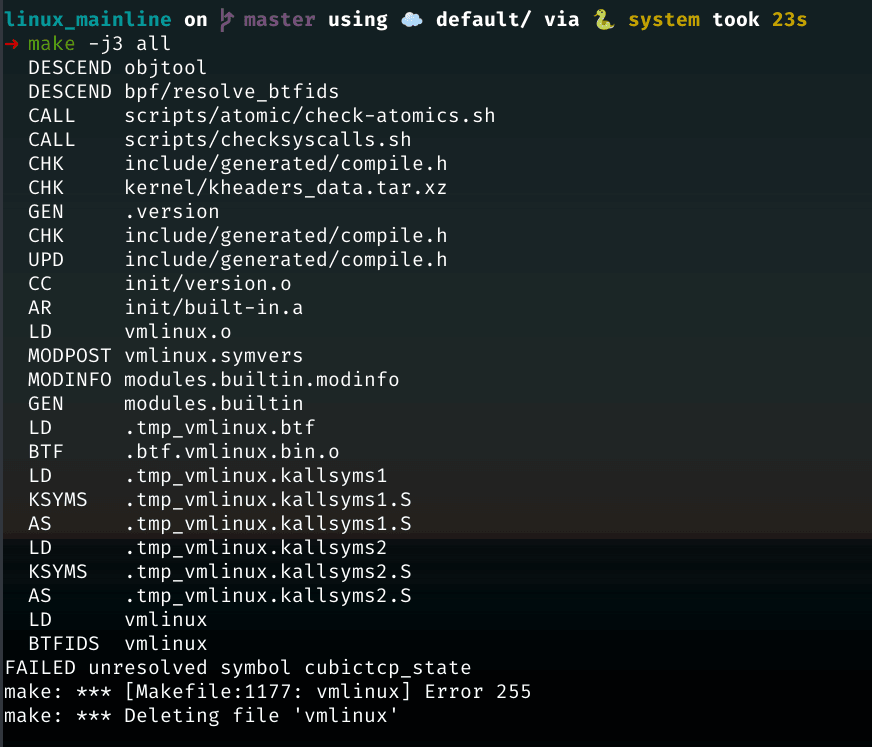
Upon further discovery I found that the above error was patched in a newer dwarves package. But unfortunately that is not supported by my Ubuntu version.
Reading through the patch file, I understood that the above error is occurring due to some missing headers or symbols. And it clicked me that it could be easily solved if I build the dwarves package from source.
And thus, I solved the above error by cloning the dwarves library and building it from source.
Zstd (Z standard compression) library was missing
Due to the above library not being present in my system. I got the following error.
Fixed the above problem by installing the zstd package.
Stuck at Loading initrams during the boot of new Kernel
After successfully building the image, when I tried to boot into the mainline kernel, I got stuck at the loading of the initrd image. The error looked something like the below:
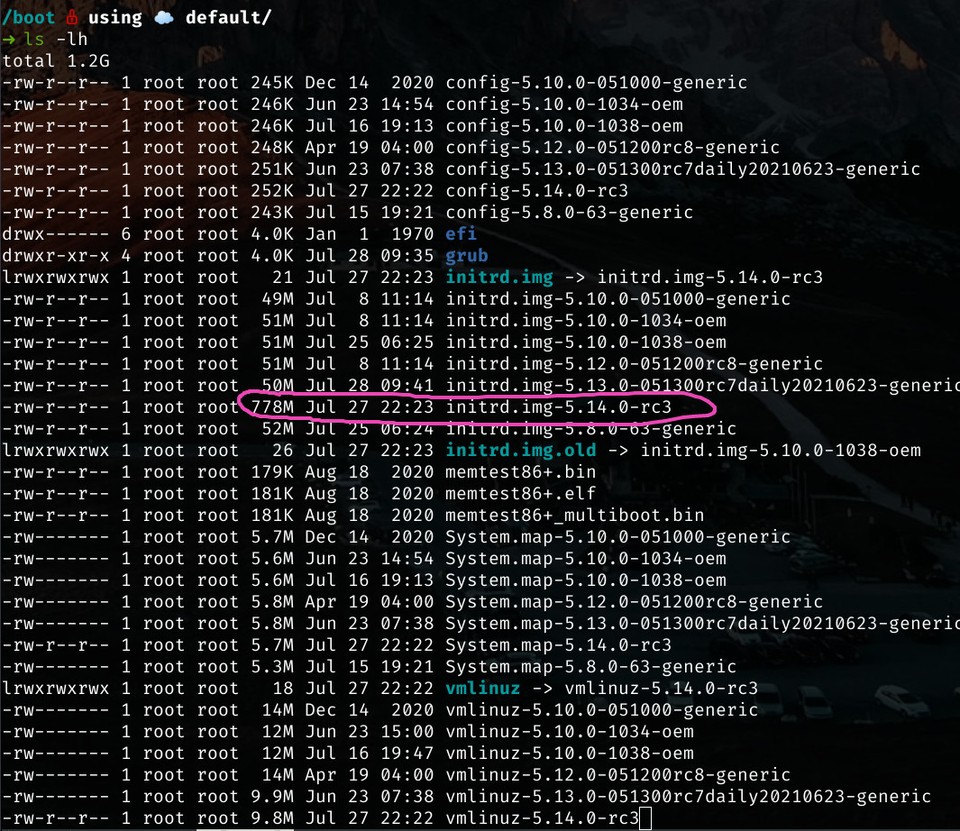
When I investigated further, I saw that the size of the initrd image of the new kernel was in hundreds of MB’s (750 MB to be specific)

Notice the size of the initrd.img-5.14.0-rc3 file in the above image, it's a
whooping 778 MB 🤯
Reading further I understood that Linux Kernel has two stage booting process. First the initrd image is loaded and then that loads the linux kernel. And grub is responsible for the initial step. But since the initrd image size was too large, grub was having a difficult time trying to load the image and then finding where the linux kernel is.
Trying to figure out what actually happened, I came across this Stack Overflow
answer
which mentioned the use of INSTALL_MOD_STRIP=1 option.
Thus I understood that the reason why the size of the intird image is too large is because the kernel modules are installed with debug symbols by default. And thus running the following in the directory where the mainline kernel was cloned, FIXED the problem:
1su -c "make modules_install INSTALL_MOD_STRIP=1 install"To be really honest, I do not understand in depth why this actually happened and why that option is not on by default. But maybe someday - I’ll come across this again and understand ^^.
It was definitely a fun experience trying to compile the mainline kernel from source and I have learned a lot of things from the very process of installing the kernel. I can’t wait to see what else will I learn on my journey in getting to know about how Kernel works ^^
Till then, Bhubyeeee :wq